KPN Fiber Connection with Ubiquiti USG, IPTV and IPv6

In my last blog post, I talked about my Home and Office Network Setup and explained that the default modem/router/Wi-Fi device you get from your ISP is not the best thing to have in your network. In this blog post, I explain what I did to directly connect my KPN fiber connection to my Ubiquiti Security Gateway (USG).
Ziggo When using a cable connection, a modem is needed to modulate the signal to be useful as TCP/IP. In this case, the only option you have is to set up the modem in Bridge mode. When your modem is in Bridge mode, it will give you a public IPv4 address, and all other functions like Wi-Fi and firewall are disabled. Note, IPv6 is currently not supported in Bridge mode.
When using a fiber connection, you do not need a modem. The fiber connection is already TCP/IP, only the medium (fiber) needs conversion to Ethernet. KPN comes with a medium converter (FTTH), which gives you a TCP port with a public IP (VLAN 6) and IPTV (VLAN 4).
Ubiquiti USG
Not all settings are available in the UniFi controller web interface. So we need some configuration scripts. I used the scripts from Henk van Achterberg. He created excellent scripts that work for my situation.
Download the scripts from GitHub.
Upload the config.gateway.json to the unifi controller (/usr/lib/unifi/data/sites/default) using SCP (I use WinSCP).
Tip: If you do not see the sites/default folder, it will be created by uploading a Map in the UniFi controller web interface.
Upload the dhcp6.sh and setroutes.sh to the USG (/home/«user») using SCP.
Login using SSH (I use PuTTY) into the USG and execute the following commands:
sudo mv dhcp6.sh /config/scripts/post-config.d/
sudo chmod +x /config/scripts/post-config.d/dhcp6.sh

sudo mv setroutes.sh /config/scripts/post-config.d/
sudo chmod +x /config/scripts/post-config.d/setroutes.sh
KPN sends static routes via DHCP, which the USG does not install by default. This script will install the DHCP routes when a DHCP lease is received. The chmod +x command allows the script to be executed.
In the UniFi controller web interface, go to the USG in devices and force provisioning.
After provisioning, reboot the USG. After two minutes, IPv6 will be available.
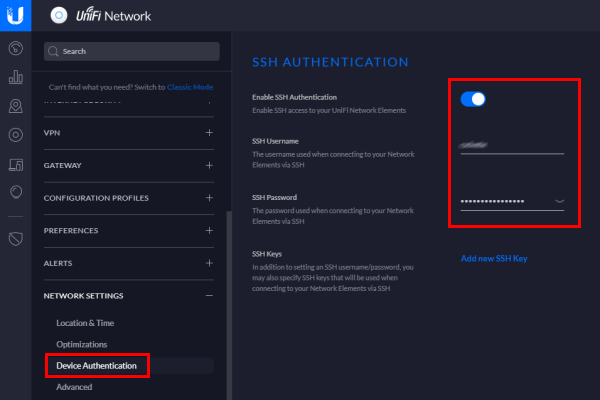
SSH Authentication
To login using SCP and SSH, you need to enable the SSH Authentication in the UniFi controller web interface. You can find it under Network Settings -> Device Authentication.
